Easy instructions for installing add-ons with Kodi Estuary skin.

Installing add-ons on Kodi Estuary
There are many developers who create add-ons for Kodi. The developers store their add-ons in something called a repository. You connect to the repository (or repo for short) and then you have access to the developers add-ons. Searching Youtube or google for ‘Best Kodi repos and add-ons’ gives you a good idea of the types of repo’s available and the ‘http’ addresses you need to connect to them. Once you have decided on a repo to connect to, carry out the below.
Step 1: From the main Kodi menu, scroll down and select the folder icon next to the favourites star.

Step 2: This opens the file manager section. Select add source

Step 3: From here click on the ‘none’ selection

Step 4: Now enter the http: address of the source of the repository and click done

Step 5: Scroll down and select to enter a name for the repo which will appear in the list of sources when done for this tutorial I have named it example.

Step 6: Once you have clicked OK and have come back out to the sources list, you will see your connected repo in the list. You can edit it or remove it by pressing the menu key on your remote

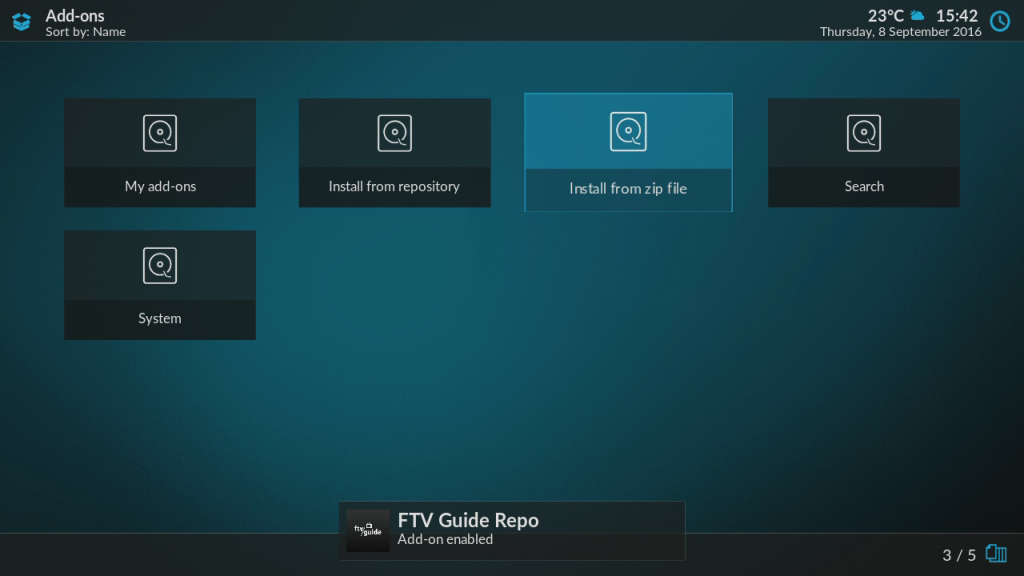
Step 7: Now exit back out to the main Kodi Estuary menu and with add-ons selected, scroll over to the icon depicting an arrow in a box and select it.

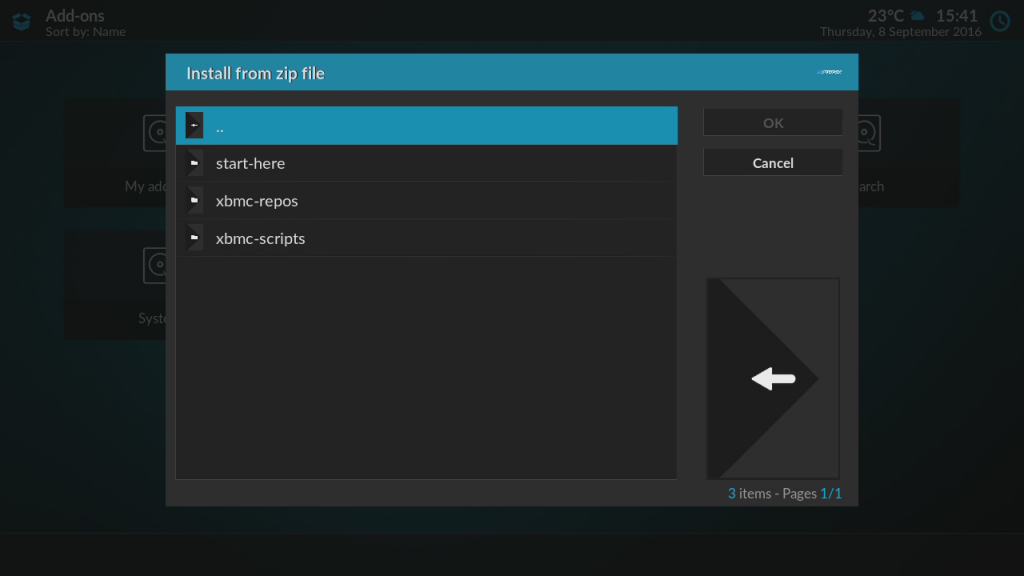
Step 8: From this window choose install from zip file

Step 9: Choose the name of your newly added repo from the list of locations

Step 10: Inside you will find the add-ons created by that particular developer, or, as in the case pictured below you will see some folders that contain add-ons from multiple developers.
Step 11: Once inside any of the folders you should see a list of add-ons. Add-ons will have a .zip file extension.
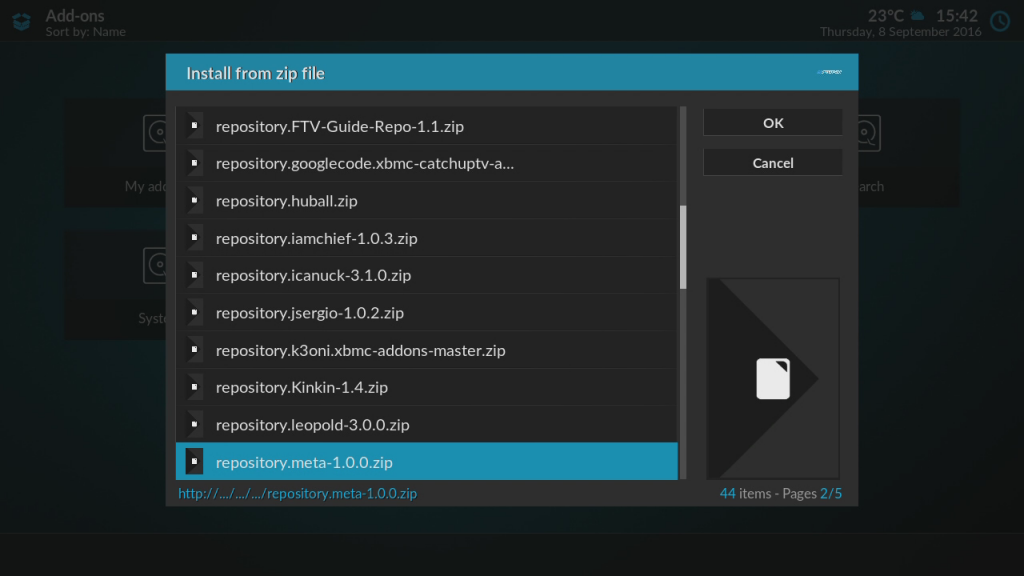
Step 12: Select the add-on you wish to install and a message will appear at the bottom of the screen telling you that the add-on has been installed successfully.
Step 13: Now, to access the newly installed add-on, press the return/back key on your remote to come all the way back out to the main menu then select ADD-ONS from the left menu.
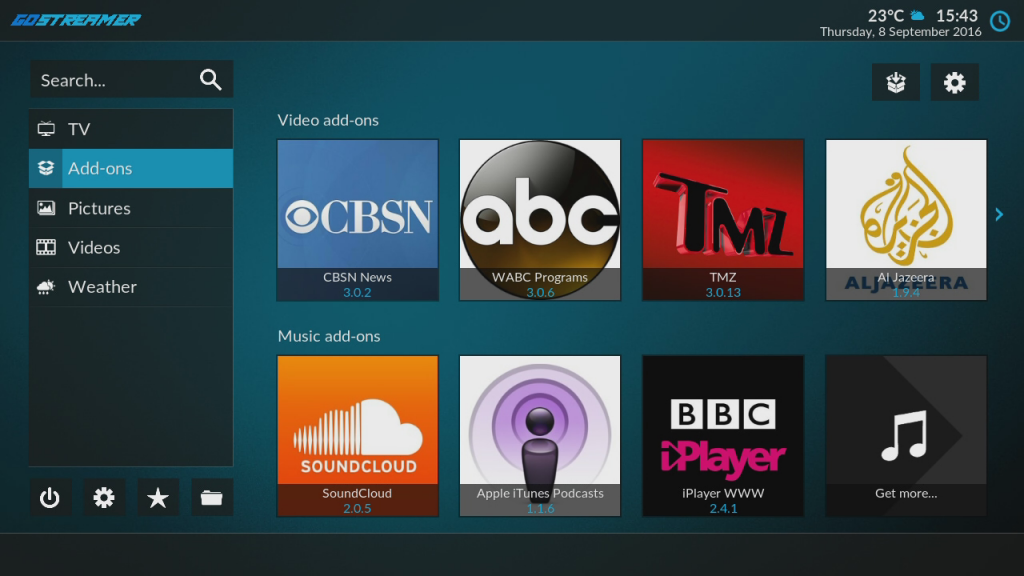
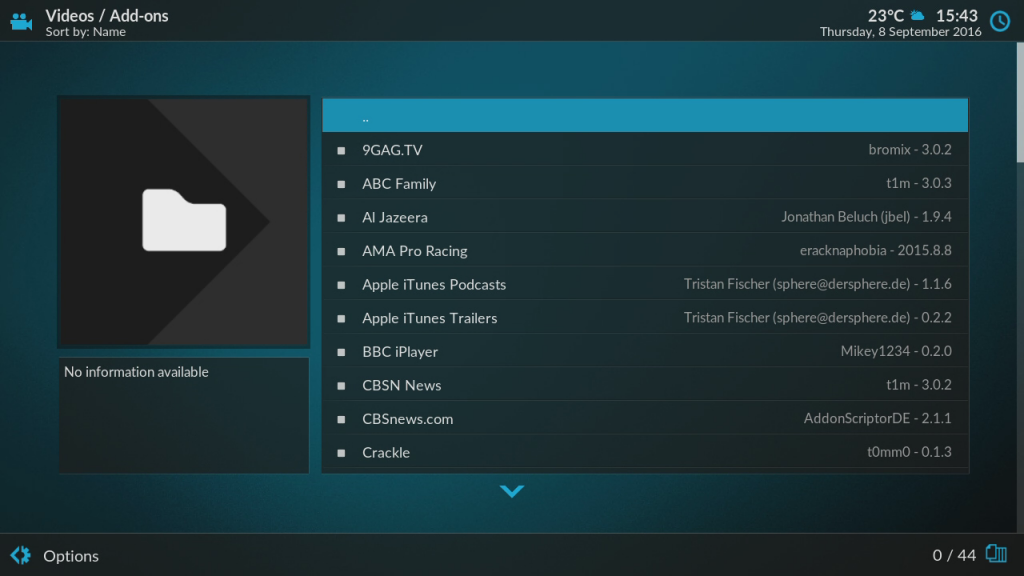
Step 14: Inside the ADD-ONS menu you will see 4 submenus for the different types of add-ons Kodi has. Video add-ons, Music add-ons, Program add-ons and Picture add-ons. If you just installed a Video add-on, select VIDEO ADD-ONS and you will be go into the Video add-ons section (or if not, go into the section for the type of add-on you installed).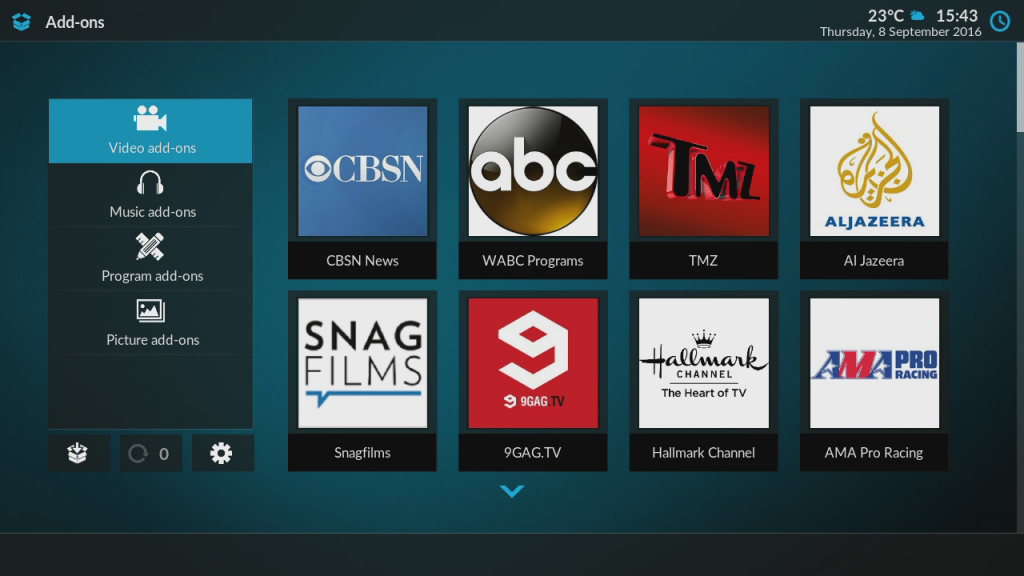
Step 15: You can now see all the Video add-ons that are installed on the box in the list on the right. Scroll down the list and select the add-on you just installed.